Rexing H2 trail camera is one of those listings that reads like a “too good to be true” sandwich: 4K video, up to 20MP photos, Wi-Fi viewing, a built-in screen, night vision out to typical IR ranges, and the kicker—a 2-pack deal that gets you coverage in more than one place without paying cellular-cam money. So we treated it the way real people actually use trail cams: we planned coverage, we talked settings like adults, and we focused hard on the biggest truth in trail-cam land—placement beats specs every single day of the week.
This is intentionally written for beginners and the folks who’ve already burned an SD card full of “nothing.” You’ll get plain-English explanations, real-world recipes, and enough technical clarity to understand why a camera sometimes triggers with “no animal” in frame (spoiler: it’s not always the camera’s fault). Additionally, you’ll walk away with a practical checklist so you can set these up once and spend your time hunting, working, or sleeping instead of playing “Trail Cam Babysitter 3000.”
This Rexing H2 trail camera review breaks down setup, Wi-Fi app checks, 4K vs 1080p decision-making, night vision, SD cards, power options, and the best settings for hunting and property security—without turning it into a tech lecture.
Quick Answer
If you want a Wi-Fi trail camera that records in 4K, captures up to 20MP photos, supports large microSD cards (up to 512GB per Rexing), and comes as a 2-pack so you can cover more than one location right now, the Rexing H2 trail camera is a strong value play. It’s best for hunters and landowners who want solid footage and easier checking without paying cellular subscription costs.
However, don’t buy this thinking Wi-Fi means “sends pics to your phone from miles away.” It’s local Wi-Fi for near-camera access. In other words, you can walk up, connect, preview, download what you want, then leave. Done right, that’s a big quality-of-life upgrade.
Quick View
- Best for: trails, scrapes, water edges, feeders (with proper intervals), gates/driveways, barns, and general property monitoring
- Standout feature: Wi-Fi app checks + built-in 2.4″ screen for quick field review
- Video: 4K / 2.7K / 1080p (day and night) with audio recording
- Night vision: dual 850nm IR LEDs with advertised range up to ~65 ft
- Trigger: advertised as fast as 0.2s; 105° PIR detection angle is listed
- Storage: microSD Class 10 / UHS-I or higher, up to 512GB (Rexing also recommends specific cards and warns against some)
- Power: 8x AA (not included), external 6V input, and solar support (6V 1.5A noted)
- Weather: IP66 rating; operating range listed from −4°F to 140°F
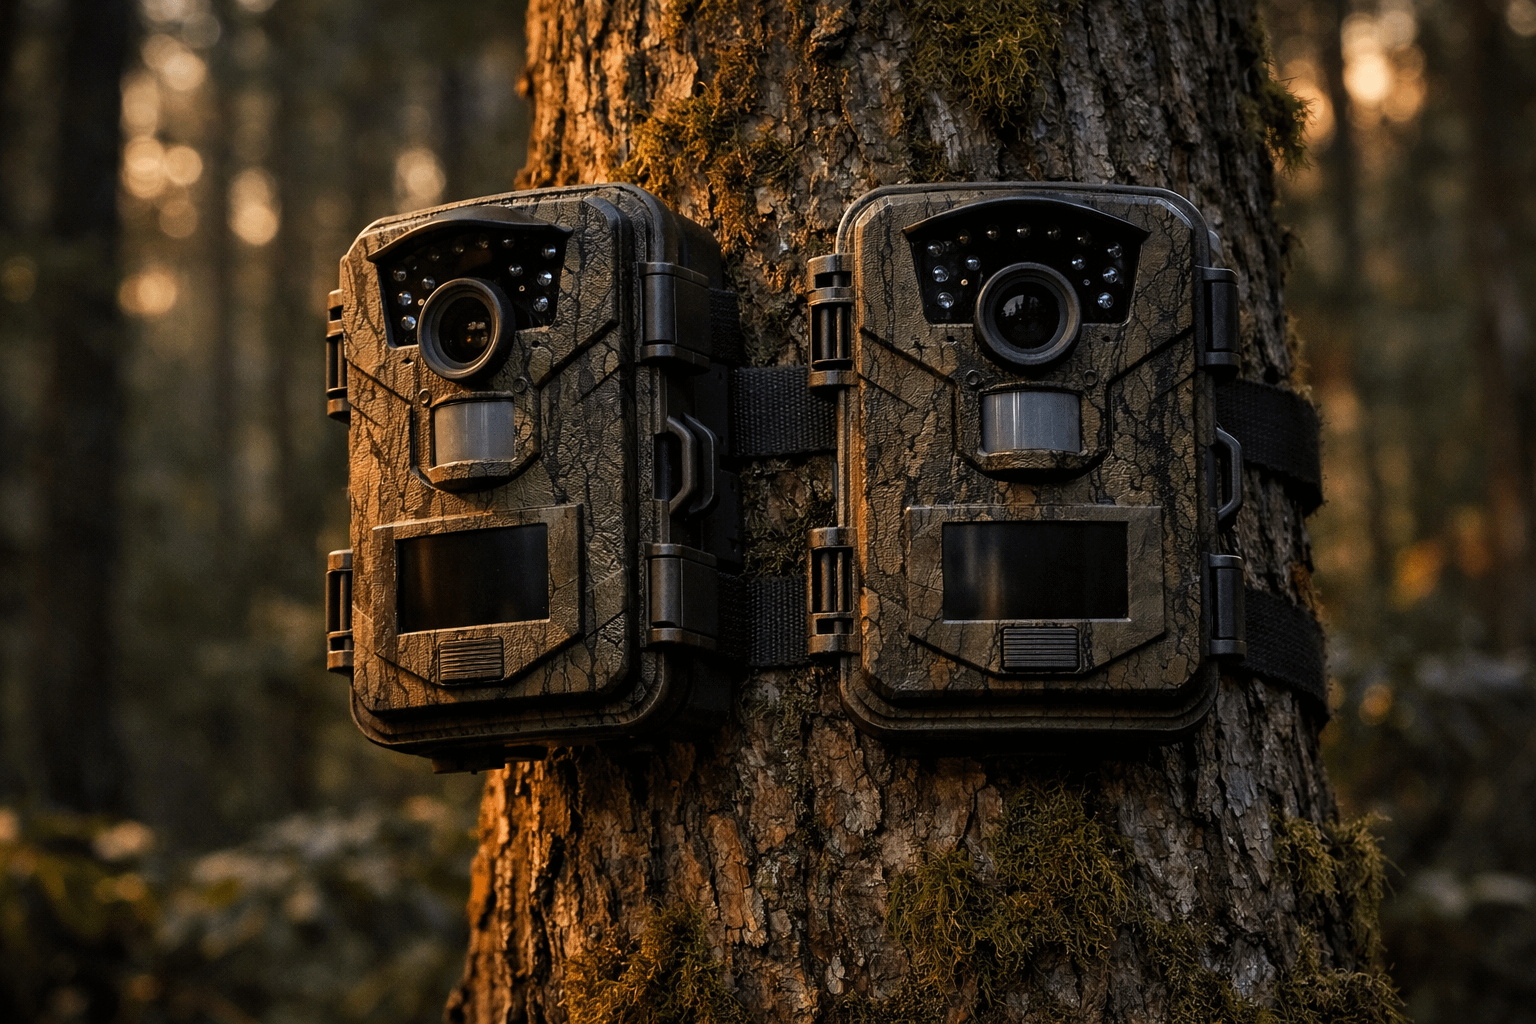
Why the 2-Pack Actually Matters
A single trail cam is fine… until you realize you have multiple questions at once. For example: “What’s using this trail?” and “Where are they going?” and “Why are my feed bags disappearing?” One camera forces you to move it constantly. Meanwhile, two cameras let you run a plan.
Here’s what the 2-pack does in the real world:
- Trail + destination coverage: one watches a travel corridor, the other watches the scrape/water/feeder edge.
- Security split: one watches the approach lane, the other watches the actual asset (gate, barn, shed).
- Angle control: you can avoid sunrise/sunset glare by putting cams on different sides instead of forcing one angle to do everything.
- Less disturbance: fewer trips to relocate a single cam means less scent and less human pressure.
In short: two cameras means fewer blind spots and fewer wasted weeks.
Specs Table
| Spec (from Rexing listing) | What it means when you’re actually using it |
|---|---|
| Video: 4K / 2.7K / 1080p | Pick maximum detail (4K) or longer storage/battery friendliness (1080p). You’re not locked into one. |
| Photo: up to 20MP (8MP CMOS sensor noted) | Still images can help confirm direction, time, and behavior; however, placement is still king. |
| Wi-Fi + app viewing + built-in 2.4″ LCD screen/speaker | Preview/download nearby without pulling the card. Screen helps confirm aim immediately. |
| AV output | Connect to a TV/monitor for quick review without a computer. Handy at camp or shop. |
| Trigger: as fast as 0.2s (advertised) | Useful on fast movers, especially if you aim down-trail so the subject stays in frame longer. |
| Detection: 105° PIR angle (listed) | Wider detection can help catch movement earlier; it also means placement matters more to avoid “empty triggers.” |
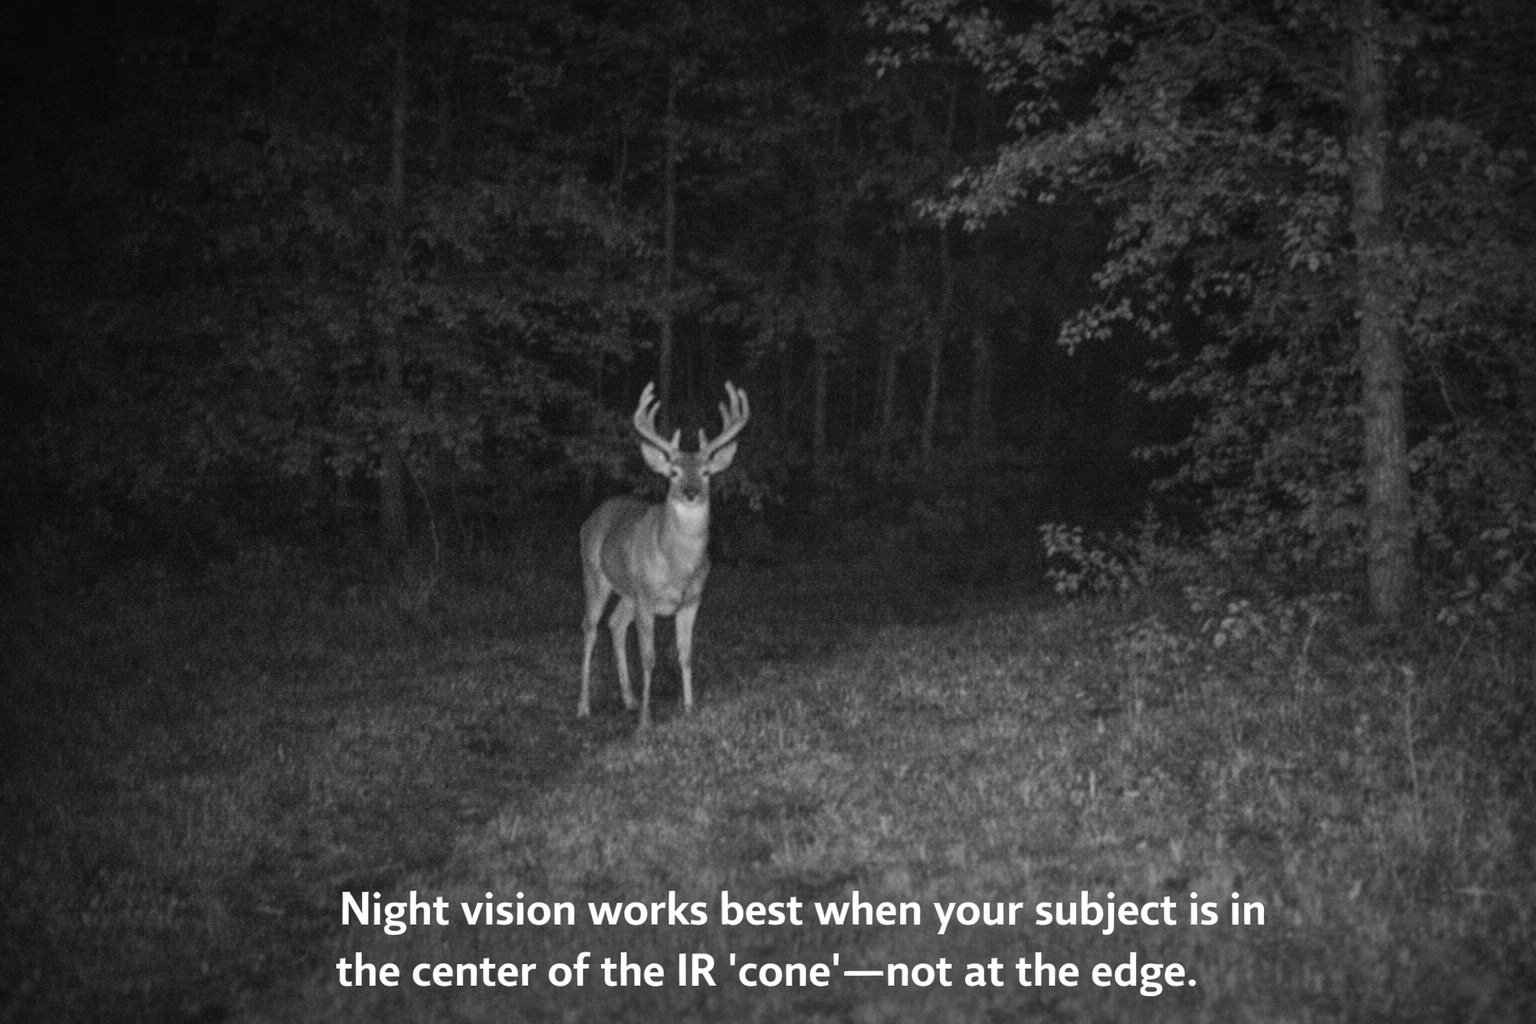
| Night vision: dual 850nm IR LEDs; up to ~65 ft (advertised) | Works best with clear foreground and the subject centered in the IR cone. |
| Storage: up to 512GB microSD (Class 10 / UHS-I+ required) | High capacity is great, but you need the right card type and you should format in-camera. |
| Power: 8x AA; external 6V DC; solar compatible (6V 1.5A noted) | Battery only is fine for scouting; external/solar is smarter for high-traffic security locations. |
| Weather: IP66; −4°F to 140°F listed | Built for outdoor abuse. Still, mount smart: avoid direct runoff and reflective surfaces. |
Important note: The listing headline mentions “12 month standby,” while the product page also describes “up to 16 months” in power-saving standby mode depending on usage. Real-world life depends on triggers, video length, temperature, and Wi-Fi use—so treat any “months” number as a best-case scenario, not a promise.
What’s in the Box + Build Notes
Trail cameras live outside. That means they’re basically unpaid interns for bad weather. So build quality matters: seals, latch fit, strap mount strength, and whether the door feels like it’ll survive a season of opening with cold fingers.
According to Rexing’s package contents list, you’re looking at a practical kit: camera(s), remote control, strap mount, screw mount, mounting screws, installation tool, USB cable, AV cable, and a quick guide. Batteries and microSD cards are not included, which is normal. Also worth noting: the cable listed is USB to mini-USB, which strongly suggests the camera uses a mini-USB port instead of USB-C. That’s not a dealbreaker, but it is a “welcome to 2013” moment.

First Setup at Home (Do This Once)
If you want fewer problems in the field, do your first setup at home—on a table, with coffee, and without frozen hands. That one decision prevents about 80% of “this thing is junk” frustration.
Step 1: Install batteries like you mean it
Use a full matching set of batteries. Don’t mix brands. Don’t mix old and new. Additionally, if you plan to run these through cold weather, lithium AAs usually outperform alkalines. On the other hand, if you’re scouting in mild temps, quality alkalines can be fine.
Rexing specifies Class 10 / UHS-I or higher microSD/SDHC/SDXC cards up to 512GB, and they recommend specific models (Kingston Canvas Go!, Kingston Canvas React, SanDisk High Endurance). They also explicitly warn: don’t use SanDisk Ultra cards with their cameras. That warning is gold. Don’t ignore it. If you do, you may win a free lifetime membership to the “random corrupted files” club.
Step 3: Format the card in-camera
Yes, even if the card is new. Yes, every time you swap cards. Yes, it matters. Formatting in-camera reduces file system weirdness and lowers the odds of corrupted or missing clips. Also, it’s faster than arguing with your laptop at midnight.
Step 4: Set date/time and sanity-check it
For hunting, time stamps matter for movement patterns. For security, they matter even more. Therefore, set time and date, confirm it, then leave it alone unless you change batteries or firmware.
Step 5: Run a “walk-by” test clip
Mount the camera temporarily (or prop it up), then walk across its field of view at different distances. This teaches you two things immediately:
- Whether your aim and height are sensible
- How wide the detection feels versus how wide the recorded view actually is
After that, you’re ready for field placement without guessing.
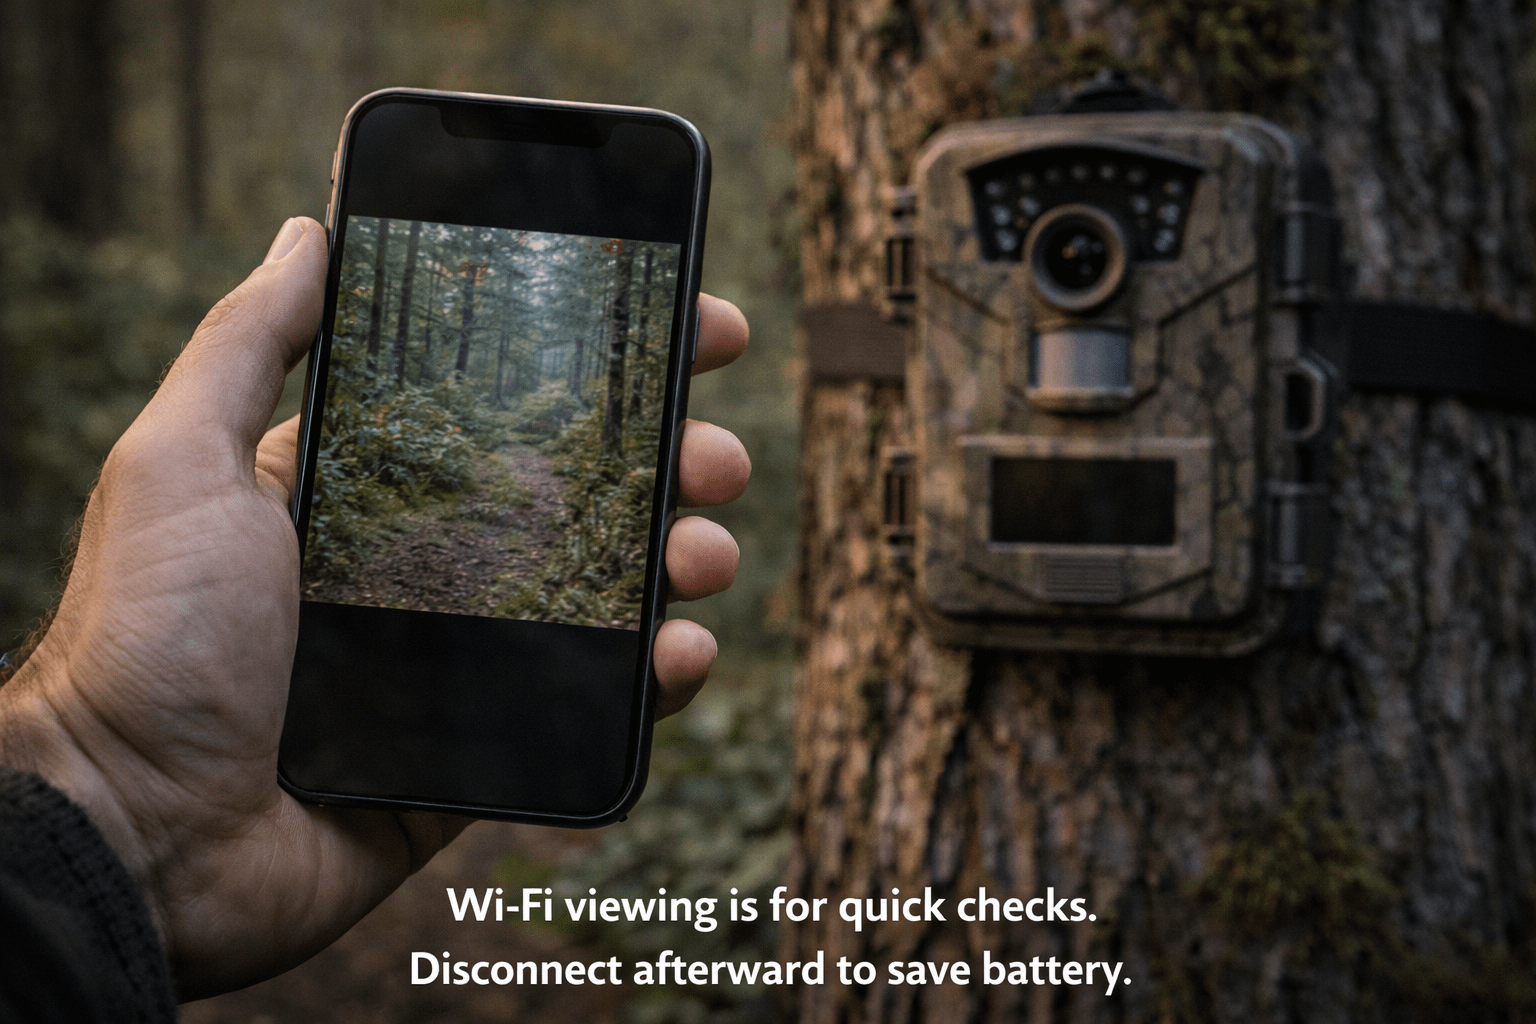
Wi-Fi + App Viewing in the Field
This is where the Rexing H2 trail camera earns its keep for a lot of people. With Wi-Fi, you can connect to the camera locally when you’re close, preview clips/photos, download what you want, and move on—without pulling the microSD card and without hauling a laptop around like you’re editing a nature documentary in the woods.
Reality check: Wi-Fi is not cellular
Wi-Fi means near-camera access. Cellular means remote delivery. If you need photos sent to you while you’re at work, you want a cellular trail cam. However, if your goal is “quick checks with less hassle,” Wi-Fi is a strong middle ground.
Battery tip: Connect, check, disconnect
Wi-Fi features can increase power use if you leave them running. So treat Wi-Fi like a tool, not a lifestyle. Connect, verify what you need, and then disconnect. Your batteries will thank you, and your camera will stop living like it’s on a constant Zoom call.
Wi-Fi range expectations
Range depends on terrain, trees, humidity, and whether your phone has a protective case thick enough to stop a bear. In open air you’ll do better. In thick woods, expect less. Therefore, plan your check spot: stand where you can connect consistently, and don’t waste time doing the Wi-Fi “two steps left, one step right” dance if you can avoid it.
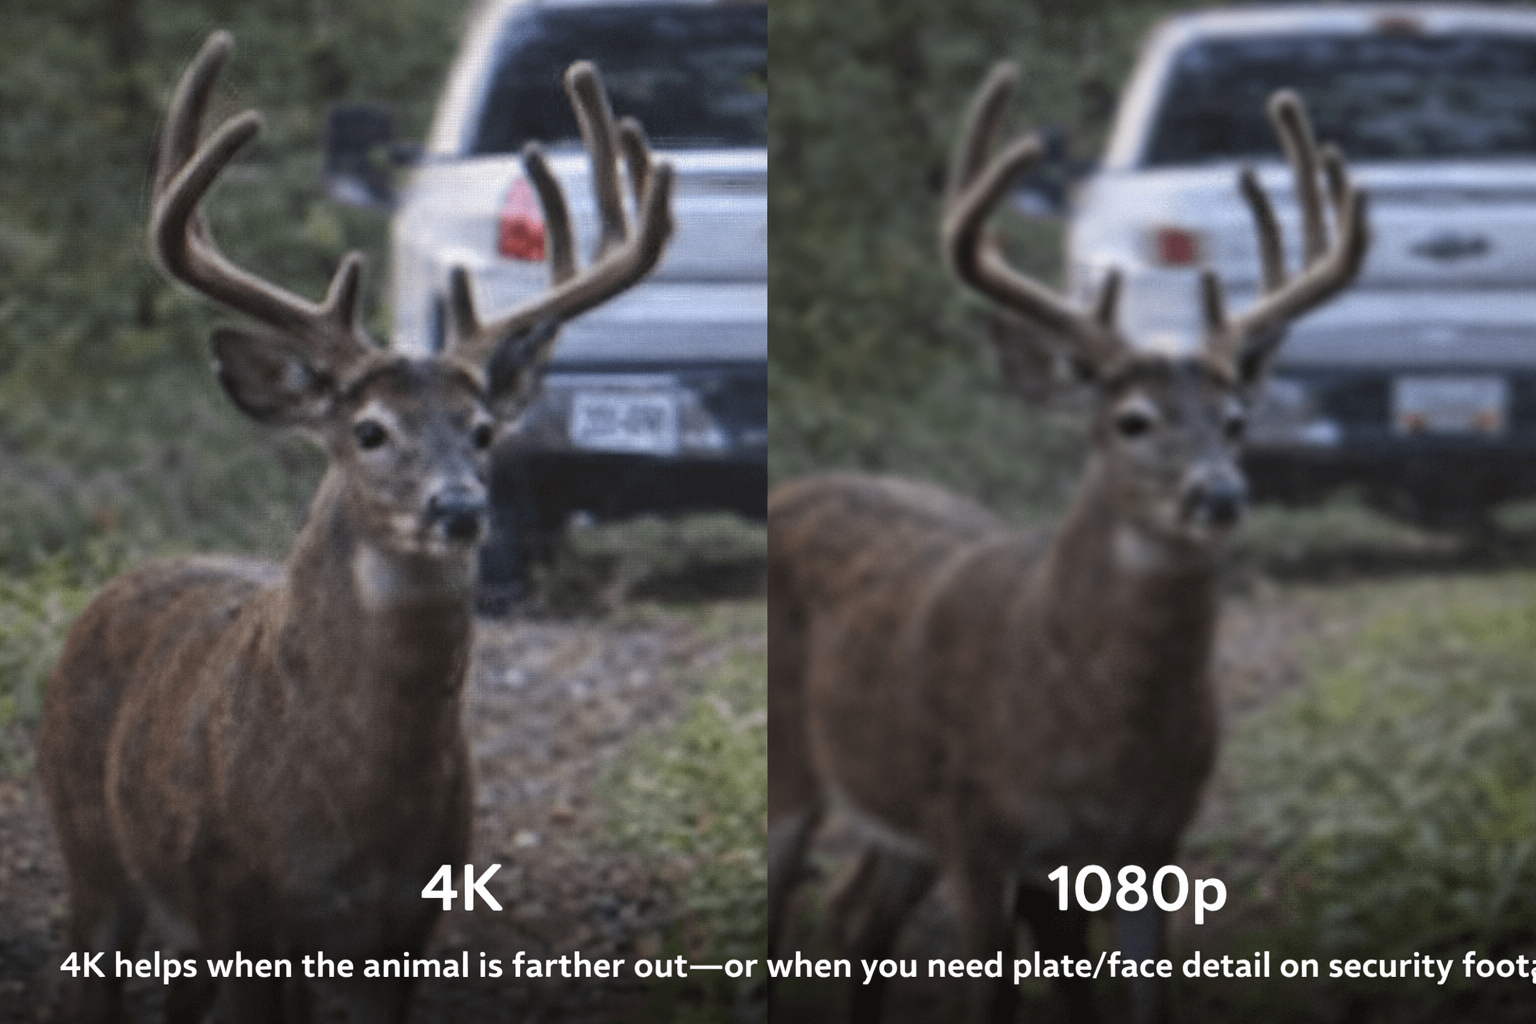
4K vs 1080p: When It Helps and When It’s Just Big Files
4K is not automatically “better” in every scenario. Instead, it’s “more detail,” which is helpful when you need to zoom or when your subject is farther away. Meanwhile, 1080p is often the smarter play on high-traffic trails because it saves storage and can extend battery life.
When 4K is worth it
- Food plot edges and open areas: animals can be farther out, so extra detail matters.
- Security use: identifying details are the goal (vehicle type, faces, movement).
- Daytime-heavy locations: more light usually means cleaner high-resolution footage.
When 1080p wins
- Busy travel trails: lots of triggers means lots of files, fast.
- Long deployments: smaller files reduce card churn and maintenance.
- Night-heavy capture: you may prefer consistent results over maximum resolution.
A simple rule that keeps you sane
If your goal is scouting movement patterns, 1080p is usually enough. If your goal is identification at distance or security detail, consider 2.7K or 4K. Additionally, you can run one camera in 1080p on the trail and the other in 2.7K/4K on a more open destination site. That’s the 2-pack advantage showing up again.
Photo Modes: 20MP, Bursts, Time-Lapse
Trail cam photos are often the best scouting tool because they’re fast to review, easy to store, and you can build a timeline quickly. The Rexing H2 trail camera supports stills up to 20MP (as listed), and it also supports photo series and time-lapse. That means you can set it up to capture slow patterns, like field edges, water activity, or livestock movement.
When to use photo burst
- Scrapes and rub lines: activity can be quick, and bursts catch more behavior.
- Fast trails: if you keep missing the “good frame,” burst helps.
- Close range setups: when the subject is likely to pass close and fast.
When to use time-lapse
- Open fields: pattern scouting without relying on PIR triggers alone.
- Security monitoring: documenting “what happened over time,” especially in low-motion areas.
- Construction/farm use: equipment movement, deliveries, or livestock patterns.
Beginner warning: Time-lapse can fill cards quickly if you set the interval too tight. Start conservative, then tighten only if needed.
Night Vision Deep Dive: 850nm IR, Range, and Reality
Night captures are where expectations go to fight reality. The Rexing H2 listing specifies 850nm IR LEDs and an advertised illumination distance up to about 65 feet. That’s a common “low-glow” IR setup: strong illumination, generally useful detail, and sometimes a faint visible glow at the emitter if you’re looking directly at it.
Here’s the practical part: night performance is hugely influenced by foreground clutter, reflective objects, and how long the animal stays centered in the IR cone. Therefore, the best “night upgrade” you can do is not a setting—it’s placement.
Night best practices that actually work
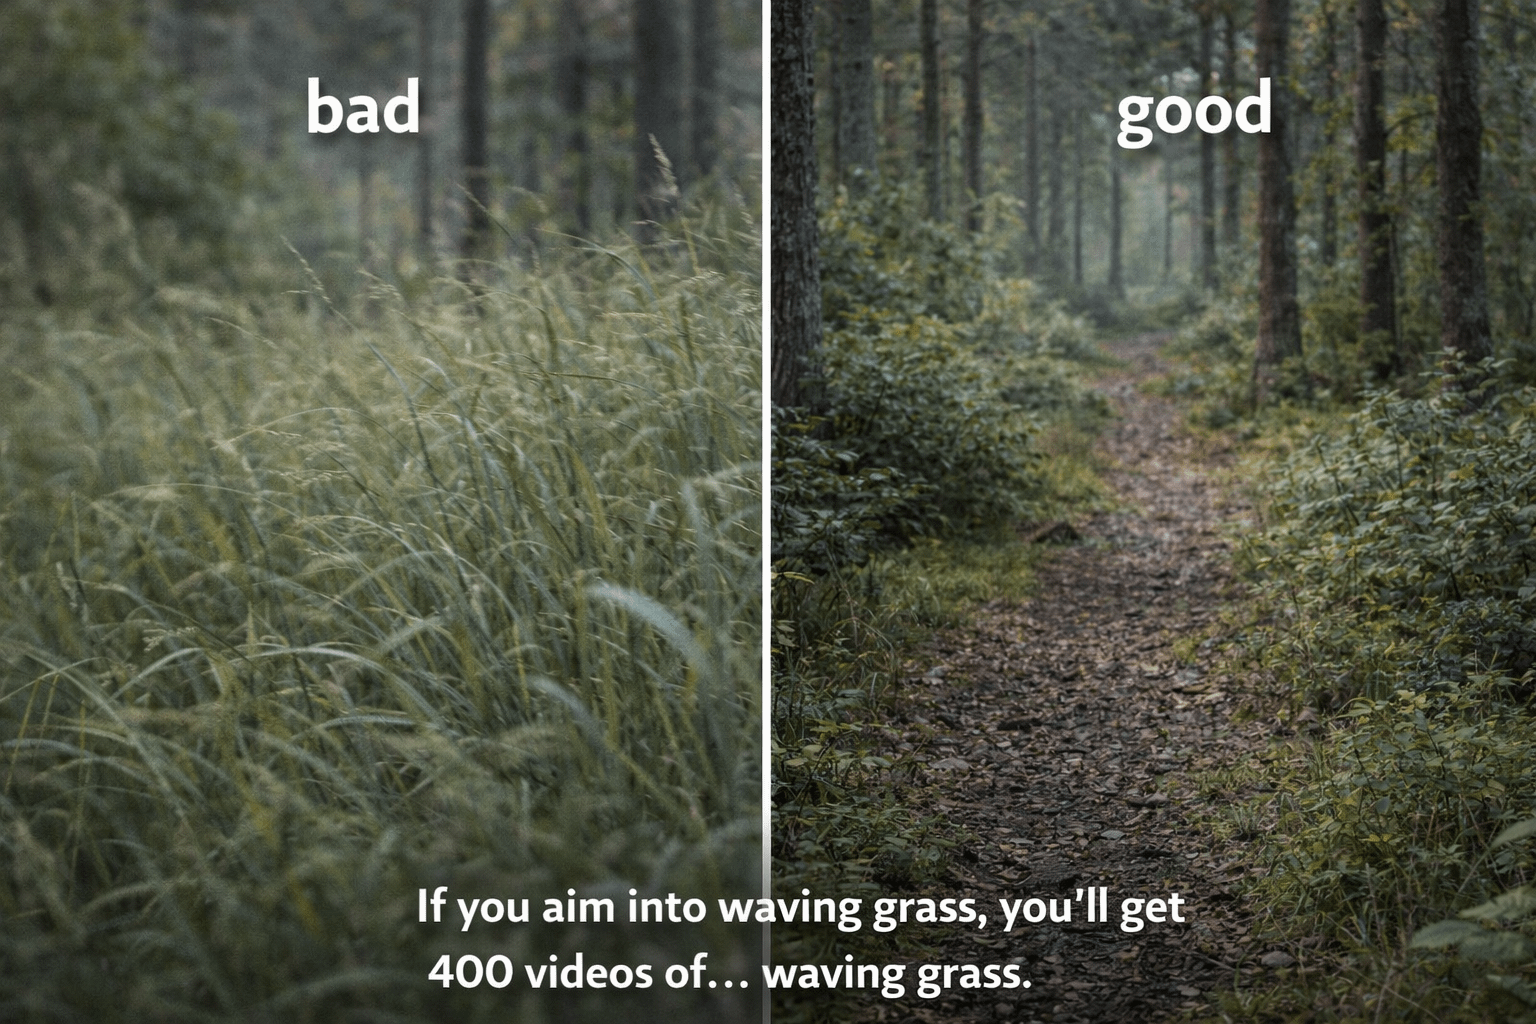
- Clear the foreground: waving grass triggers the PIR and wrecks contrast.
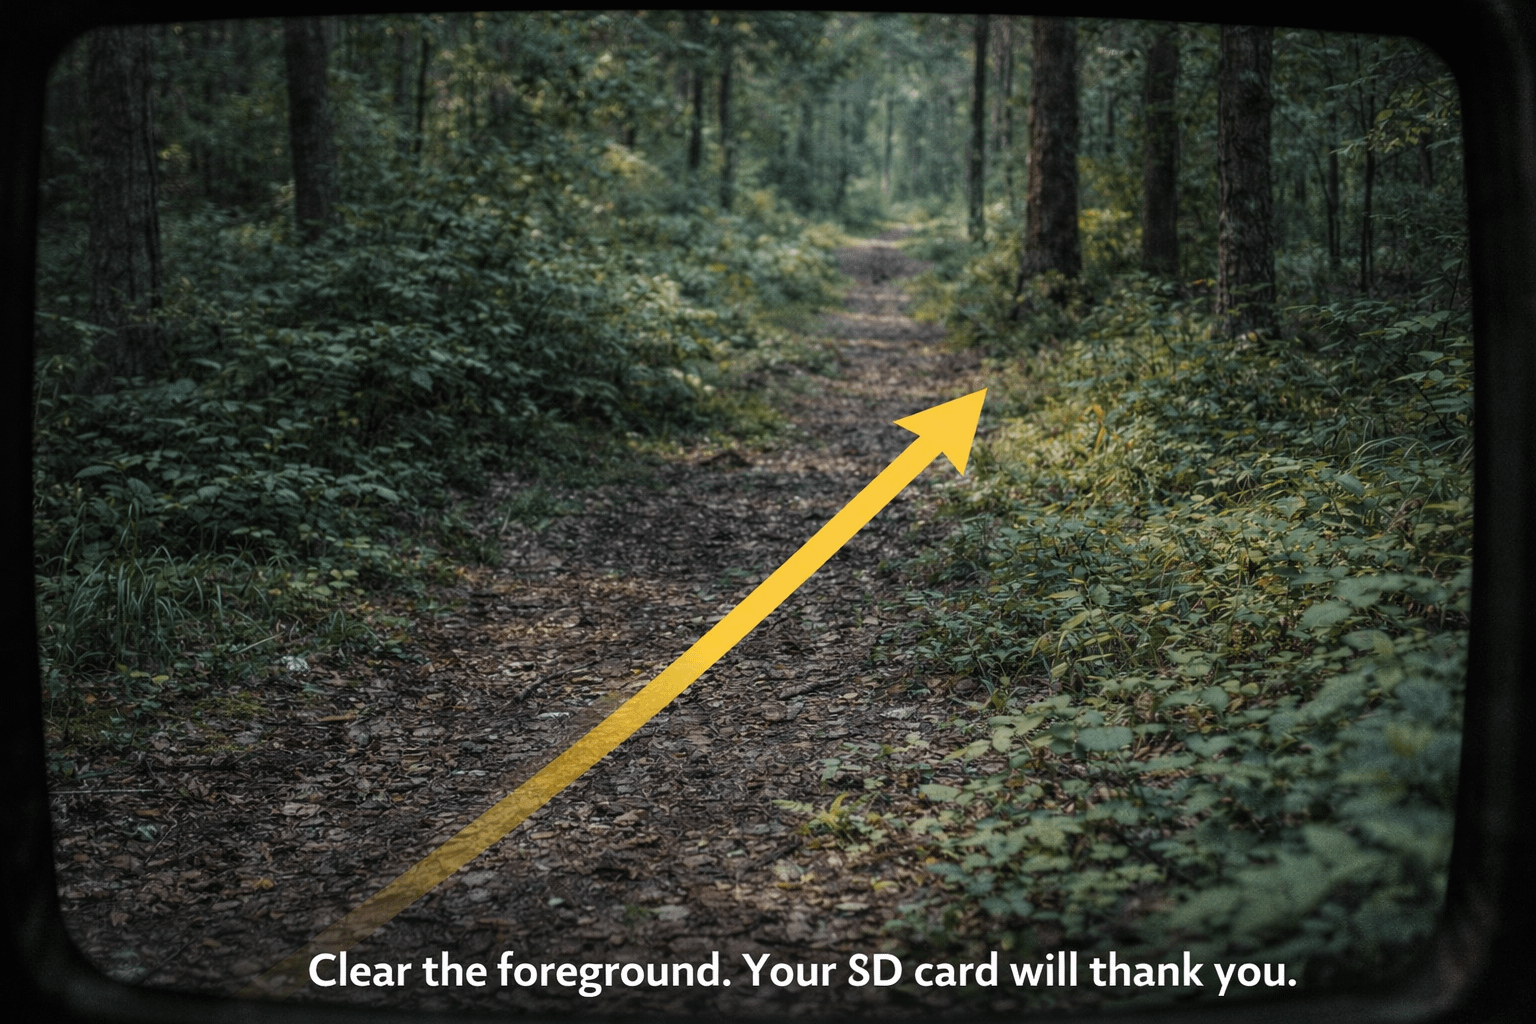
- Aim down-trail: subjects stay in the IR cone longer, so you get more usable frames.
- Avoid reflectors: metal signs, pale posts, and shiny objects close to the camera can wash out the image.
- Don’t mount too close: very close subjects can blow out IR exposure in many trail cams.
Trigger Speed + Detection Angle: Catch More, Miss Less
Trail cams don’t detect “motion” like your eyes do. They detect changes in heat moving across the sensor zone. That’s why wind-blown vegetation can trigger cameras, and it’s why a deer can sometimes slip through a bad setup without triggering. The Rexing H2 trail camera listing claims trigger speeds as fast as 0.2 seconds and a detection angle of 105°. Those are solid numbers—if your placement supports them.
Why you sometimes get “triggered… but nothing there”
Detection angle can be wider than the lens view. As a result, the PIR can “see” movement before the subject enters the recorded frame. This is normal. Therefore, aim down-trail or toward the approach, not straight across a trail. That keeps the subject traveling into your frame rather than crossing it in a blink.
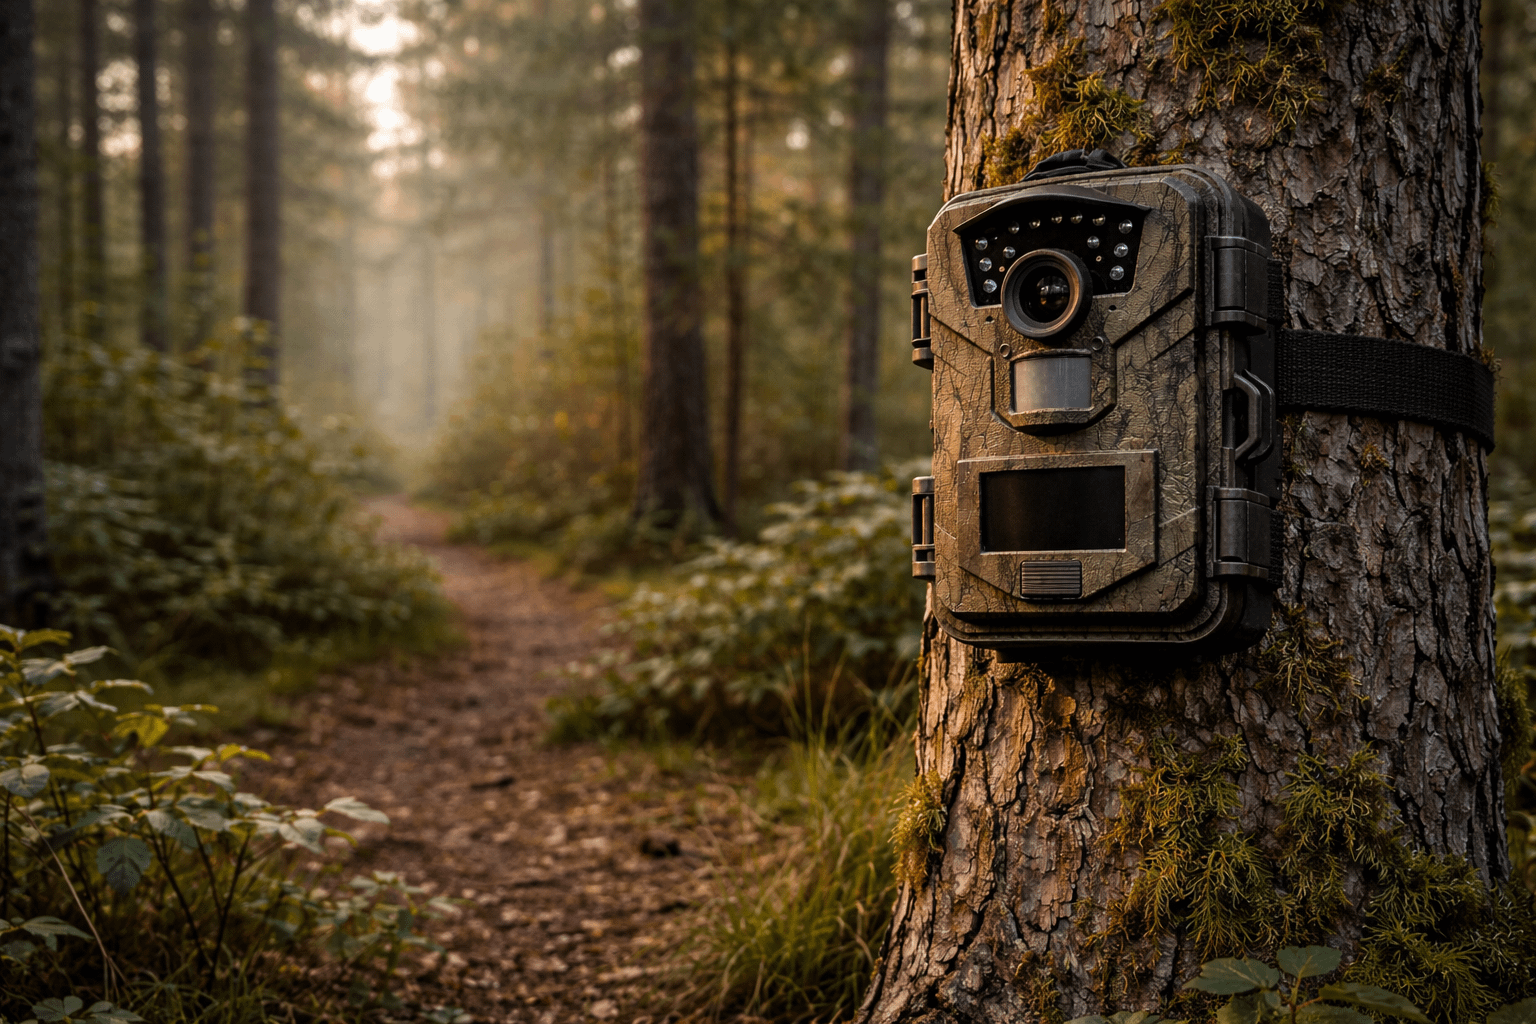
Placement Guide
If you only take one thing from this whole blog, take this: the best camera in the world can’t fix bad placement. Meanwhile, a “mid” camera placed correctly can produce great intel. So let’s make placement simple.
Height rules of thumb
- Deer trails: chest-high is a strong starting point. Aim slightly down-trail.
- Turkeys/hogs: slightly lower can help, but keep the foreground clear.
- Security/gate: mount higher to reduce tampering and capture faces/vehicles better.
Angle rules of thumb
- Don’t aim straight across a trail unless the trail is slow and wide.
- Aim down the trail so the animal stays in view longer.
- Avoid sunrise/sunset glare when possible by choosing a different tree or slightly different angle.
Clear the foreground
Remove the stuff that moves and triggers false recordings: tall grass, low branches, and weeds right in front of the lens. Leave the rest. You’re not building a golf course fairway—you’re building a clean line of sight.
Field checklist
- Is anything waving in front of the lens?
- Is the camera aimed down-trail rather than across?
- Is the lens shaded from direct sun glare?
- Is the strap tight enough that the camera won’t slowly sag?
- Did you check the first clip/photo on the built-in screen?
Property/Security Use: Gate, Driveway, Barn
Lots of people buy a trail cam for deer and keep it for security. That’s not weird—it’s smart. The Rexing H2 trail camera includes audio recording, AV output, and Wi-Fi checking, which makes it a practical “rural monitoring” tool for barns, gates, and equipment areas.
Security mounting tips
- Mount higher: harder to tamper with and better angle on faces.
- Aim slightly down the lane: captures approach and exit better.
- Avoid headlights directly into lens: shift angle if possible.
- Use external power: driveways trigger more than you think.
Privacy note: Always follow local laws and common-sense boundaries when monitoring property. Stay on your property lines and avoid filming areas where people have a strong expectation of privacy.
Power Strategy: Batteries, External 6V, Solar
Battery life is not just “what the box says.” It’s math plus environment. The Rexing H2 trail camera is described as having a power-saving standby mode with “12 month standby” mentioned in the listing headline and “up to 16 months” described on the product page—when powered by 8 AA batteries in standby conditions. Real life depends on how many clips you record, how long your clips are, how cold it is, and how often you use Wi-Fi.
Power rules that keep you from rage-swapping batteries
- More triggers = more drain: driveways and feeders eat batteries faster than quiet trails.
- Longer videos = more drain: keep video length reasonable unless you truly need long clips.
- Cold hurts all batteries: lithium is usually better if winter is involved.
- Use external/solar for security: high-traffic security setups should be powered like security setups.
External power and solar
Rexing notes support for external 6V power and solar panels (6V 1.5A). If you’re monitoring a gate or driveway, this is how you avoid swapping batteries like it’s a part-time job. Additionally, a powered setup reduces the temptation to lower settings just to survive longer, which means you can keep video quality and clip length where you want it.
SD Cards + Storage: The #1 Cause of “My Camera Sucks”
Let’s be blunt: most trail cam complaints are actually SD card problems wearing a fake mustache. The Rexing H2 trail camera page specifies Class 10 / UHS-I or higher microSD up to 512GB, recommends certain cards, and explicitly warns against using SanDisk Ultra cards. That level of guidance is unusual—and helpful—so use it.

Why “High Endurance” cards matter
Trail cams write and rewrite data constantly. High-endurance cards are designed for that kind of workload. Therefore, they tend to be more reliable for continuous recording and frequent triggers.
Format in-camera
Format the card in the camera before deployment. If you swap cards, format again. If you see weird missing files, format again. It’s the simplest fix and it prevents file-system drama.
SDHC vs SDXC
In plain terms, SDHC generally covers up to 32GB, while SDXC covers larger capacities beyond that. Most big cards (64GB, 128GB, 256GB, 512GB) are SDXC. That matters because SDXC typically uses the exFAT file system, and devices must support it to work properly. The Rexing H2 trail camera page indicates support up to 512GB with proper card requirements, which implies SDXC compatibility.
Best Settings Recipes
These are beginner-friendly “it just works” recipes. Start here, then fine-tune based on what you see.
| Scenario | Mode | Resolution | Video Length | PIR Sensitivity | Interval | Why This Works |
|---|---|---|---|---|---|---|
| Deer travel trail | Photo + Video | 1080p | 10–15s | Medium | 10–20s | Good intel without murdering storage |
| Scrape / rub line | Photo burst | High photo | N/A | High | 5–10s | Captures quick activity better |
| Food plot edge (open) | Photo + Video | 2.7K or 4K | 15–20s | Medium | 20–30s | More detail at distance where it matters |
| Feeder / bait (high linger) | Video | 1080p | 20–30s | Low/Med | 30–60s | Prevents endless duplicates when animals hang out |
| Gate / driveway | Video | 1080p | 20–40s | Medium | 10–20s | Captures approach/exit; pair with external power if traffic is heavy |
Pro tip: one cam for intel, one cam for detail
Run one H2 on a busy trail in 1080p for consistent captures. Run the second on a destination site (plot edge, water, gate) at 2.7K or 4K for detail. That’s how you use a 2-pack like a grown-up.
Pros & Cons
Pros
- 2-pack value: coverage in two locations immediately
- Multiple video modes: 4K / 2.7K / 1080p flexibility
- Wi-Fi app checks: easier review without pulling the SD card
- Built-in screen: quick aim checks in the field
- Night vision: dual 850nm IR LEDs; practical range listed up to ~65 ft
- Fast trigger claim: advertised as quick as 0.2s
- Big card support: up to 512GB with Class 10/UHS-I+
- External power + solar support: 6V input noted for longer deployments
Cons
- Wi-Fi isn’t cellular: you must be within range to connect
- 4K = larger files: storage fills faster and battery may drop sooner
- Mini-USB era vibes: cable listed is USB to mini-USB (not USB-C)
- Night blur happens: fast movers can blur on IR at night (normal for trail cams)
- Placement-sensitive: poor aim = false triggers or missed subjects
- SD card picky: Rexing warns against some cards (ex: SanDisk Ultra)
Troubleshooting
Problem: Lots of triggers, nothing in frame
- Clear waving grass and foreground brush.
- Aim down-trail, not across it.
- Reduce sensitivity one step if the site is windy.
- Avoid direct sun glare hitting the lens.
Problem: Missing files or corrupted clips
- Use Class 10 / UHS-I+ high endurance cards.
- Format the card in-camera.
- Avoid “cheap random” cards and heed Rexing’s warning about certain models.
- Swap cards if problems persist—cards fail silently.
Problem: Wi-Fi won’t connect reliably
- Move closer and remove obstructions between you and the camera.
- Tell your phone to stay connected even if it warns “no internet.”
- Connect, check, disconnect to avoid unnecessary battery drain.
FAQs
Is the Rexing H2 trail camera Wi-Fi or cellular?
It’s Wi-Fi. That means local phone access when you’re nearby, not remote delivery from miles away.
Does it really support up to 512GB?
Rexing specifies Class 10 / UHS-I or higher microSD up to 512GB on the product page, along with recommended cards and a warning against some models. Use the right card type and format in-camera.
How far does night vision work?
The listing advertises IR illumination up to roughly 65 ft. Real-world results depend on terrain, placement, and whether the subject stays centered in the IR cone.
What’s the best setting for most hunters?
Start with 1080p video + photo, 10–15 second clips, medium sensitivity, and a modest interval. Then adjust based on how busy the trail is.
Final Word
If you’re hunting, monitoring land, or just tired of guessing what’s moving through your property, the Rexing H2 trail camera 2-pack is a smart way to get real coverage without paying cellular-cam costs. The Wi-Fi checks and the built-in screen reduce the “card swapping” hassle, and the ability to run one camera on a trail and another on a destination site is the whole point of the bundle.
Here’s the honest truth: this camera won’t fix bad placement. Nothing will. However, if you follow the placement rules (clear the foreground, aim down-trail, avoid glare) and you use the right microSD card (and format it in-camera), you’ll get clean intel that actually helps you make decisions. And that’s the real win—less wandering, more knowing.
Translation: two cameras, fewer excuses, and way less footage of… waving grass.
I like the helpful info you supply to your articles.
I’ll bookmark your blog and check again right here regularly.
I’m reasonably certain I’ll be told a lot of new stuff right here!
Good luck for the following!